Quick and Easy Lemon Pepper Chicken: Perfect for Meal Prep
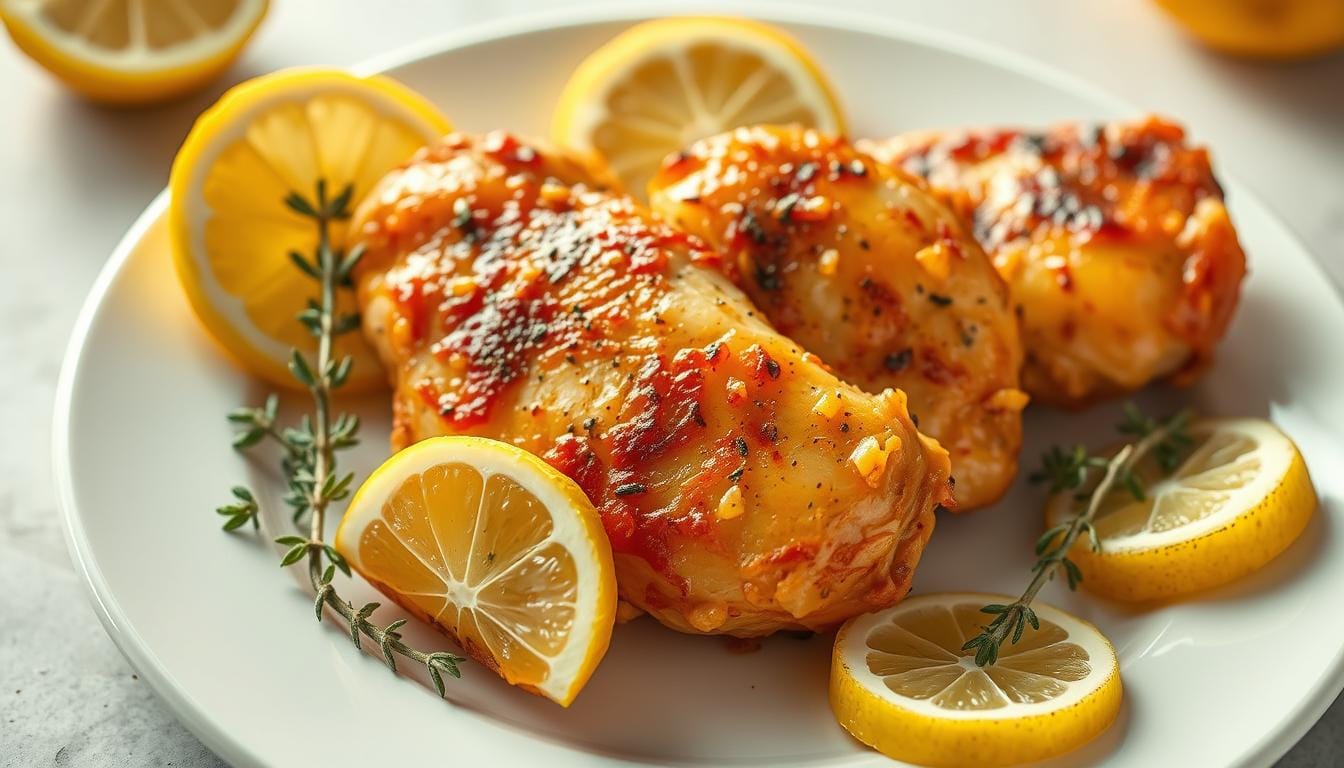
Busy weeknights call for meals that are both quick and delicious. This lemon pepper chicken recipe is here to save the day. With just a few simple ingredients, you can create a flavorful dish that’s perfect for meal prep.
This recipe is designed for convenience. You can prepare it in under 30 minutes, making it ideal for those hectic evenings. Plus, it’s versatile enough to pair with your favorite sides like rice or a fresh salad.
Whether you’re new to cooking or a seasoned pro, this lemon pepper chicken will quickly become a favorite in your meal rotation. It’s a dish that’s as easy to make as it is to enjoy.
Table of Contents
Key Takeaways
- Quick and easy recipe perfect for busy weeknights.
- Uses fresh ingredients like lemon juice and garlic.
- Pan-fried to golden brown perfection with a zesty sauce.
- Ideal for meal prep and pairs well with various sides.
- Ready in under 30 minutes, making it a convenient option.
Introduction: Discover a Delicious Meal Prep Option
Looking for a meal that’s both quick and satisfying? This recipe has you covered. With just a few simple steps, you can create a dish that’s perfect for busy weeknights or meal prep. The combination of fresh ingredients and a zesty seasoning blend makes it a standout choice.
Overview of the Recipe
This dish starts with lean chicken breast, seasoned with a flavorful blend of lemon pepper and garlic. The cooking process is straightforward, taking just 20 minutes from start to finish. You’ll pan-fry the chicken to golden perfection, then drizzle it with a tangy sauce made from fresh lemon juice and butter.
Here’s a quick breakdown of the steps:
- Season the chicken breast with lemon pepper and garlic powder.
- Pan-fry until golden brown, about 6-8 minutes per side.
- Prepare the sauce by combining lemon juice, butter, and seasoning.
- Serve with your favorite sides or store for meal prep.
Why This Recipe Works for Busy Weeknights
This recipe is designed for convenience. The cooking time is minimal, and the ingredients are easy to find. Plus, it’s versatile enough to pair with a variety of sides, from steamed vegetables to rice or salad. Whether you’re cooking for one or prepping meals for the week, this dish is a time-saver.
Here’s a quick look at the nutritional benefits:
| Nutrient | Amount per Serving |
|---|---|
| Calories | 289 kcal |
| Protein | 32.1 g |
| Fat | 11.3 g |
| Carbohydrates | 18.9 g |
Many home cooks have praised this recipe for its simplicity and flavor. One user shared, “It’s become my go-to meal for busy nights. The chicken is always juicy, and the sauce is amazing!”
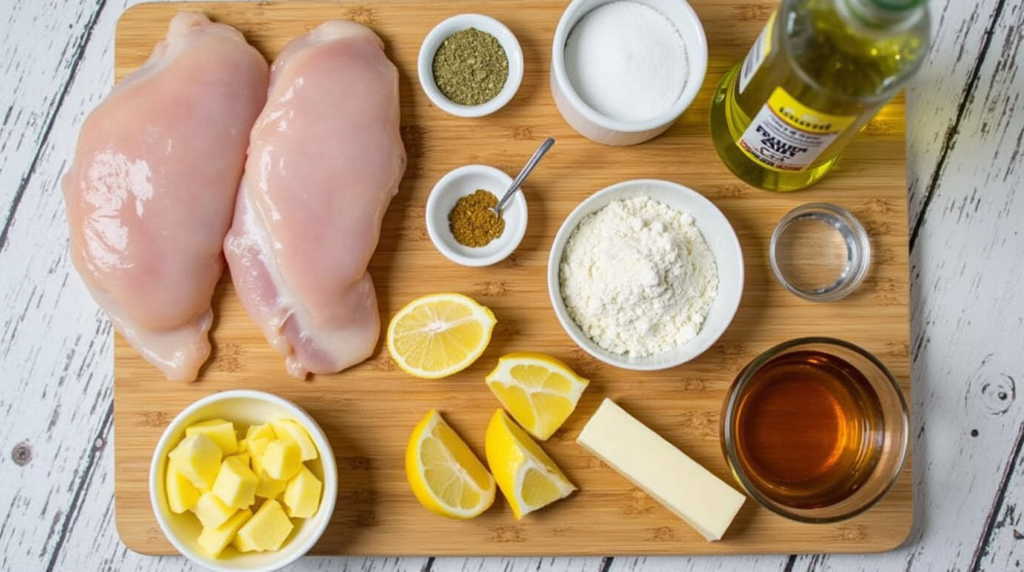
Choosing the Right Chicken and Ingredients
The foundation of a great dish starts with the right ingredients. Selecting high-quality components ensures your meal is both flavorful and tender. Whether you’re a beginner or an experienced cook, these tips will help you make the best choices.

Selecting the Best Chicken Breasts
When it comes to chicken, quality matters. Opt for boneless, skinless chicken breasts for even cooking and better flavor distribution. Look for fresh, plump cuts with a pinkish hue and no unpleasant odor.
For optimum tenderness, let the chicken sit at room temperature for 15-30 minutes before cooking. This ensures it cooks evenly and stays juicy. If you’re meal prepping, you can refrigerate seasoned chicken for up to 8 hours to enhance its flavor.
Key Spices and Seasonings to Enhance Flavor
Spices are the secret to a rich and robust flavor profile. Use a blend of lemon pepper seasoning, garlic powder, and a pinch of salt for a zesty kick. Fresh garlic adds depth, while paprika brings a subtle smokiness.
For a crisp and golden finish, choose the right oil and flour. A high-smoke-point oil like avocado or vegetable oil works best. Lightly coat the chicken in flour before cooking to achieve that perfect crust.
| Ingredient | Quality Tips |
|---|---|
| Chicken Breasts | Fresh, boneless, skinless, pinkish hue |
| Spices | Lemon pepper, garlic powder, paprika |
| Oil | High-smoke-point oil like avocado or vegetable |
| Flour | Light coating for a crisp finish |
By choosing the right ingredients, you’ll create a dish that’s both delicious and satisfying. These tips ensure every bite is packed with flavor and texture.
Step-by-Step Recipe Preparation
Achieving the perfect texture and flavor begins with careful preparation. Follow these steps to ensure your dish turns out delicious every time.
How to Slice and Dredge the Chicken
Start by slicing the chicken breast evenly. This ensures it cooks uniformly and stays juicy. Use a sharp knife for clean cuts and safety.
Next, dredge the slices in a mixture of flour and seasoning. This step creates a crispy crust that locks in moisture. For best results, coat each piece thoroughly.

Prepping the Flour and Seasoning Mixture
Combine flour, pepper, and a pinch of salt in a shallow dish. Add minced garlic for extra aroma. This blend enhances the flavor of every bite.
For a zesty kick, mix in fresh lemon juice. The acidity balances the richness of the dish. Stir the mixture well to ensure even distribution.
| Ingredient | Purpose |
|---|---|
| Flour | Creates a crispy crust |
| Pepper | Adds a zesty flavor |
| Garlic | Enhances aroma |
| Lemon Juice | Balances richness |
These steps ensure your dish is flavorful and perfectly cooked. Take your time to prepare each component for the best results.
Cooking Techniques for a Golden Crust
Mastering the art of cooking requires understanding the right techniques. Whether you’re aiming for a crispy exterior or a juicy interior, the method you choose makes all the difference. Let’s explore the best ways to achieve that perfect golden crust.

Pan-Frying Versus Baking Methods
Pan-frying is a quick and effective way to cook your dish. It uses high heat to create a crispy crust while sealing in moisture. This method takes about 4-5 minutes per side, ensuring even cooking and a golden finish.
Baking, on the other hand, is a healthier option. It requires less fat and cooks the meat evenly at a steady temperature. However, it may take longer—around 20-25 minutes—to achieve the desired texture.
Here’s a quick comparison:
- Pan-frying: Faster, crispier, but uses more fat.
- Baking: Healthier, slower, but less crispy.
Tips for Achieving a Crispy Exterior
To get that perfect crust, start with the right heat. Medium-high heat works best for pan-frying, ensuring the exterior crisps up without burning. Use a high-smoke-point oil like avocado or vegetable oil for best results.
Another tip is to coat the meat lightly in flour before cooking. This creates a barrier that locks in moisture while allowing the exterior to crisp up. For extra flavor, add a pinch of paprika or garlic powder to the flour mixture.
Finally, avoid overcrowding the pan. This ensures even heat distribution and prevents steaming, which can soften the crust. Cook in batches if necessary.
By following these steps, you’ll create a dish that’s crispy on the outside and tender on the inside. Whether you choose to pan-fry or bake, these techniques guarantee delicious results every time.
Creating a Delicious Lemon Pepper Sauce
The secret to a flavorful dish lies in its sauce. A well-crafted sauce can elevate your meal, adding layers of tangy and savory notes. This section will guide you through making the perfect lemon pepper sauce, ensuring every bite is packed with flavor.

Incorporating Fresh Lemon Juice and Garlic
Start by gathering your ingredients. Fresh lemon juice and garlic are essential for building depth and aroma. Squeeze the juice from one lemon and mince a clove of garlic. These ingredients provide a zesty kick and enhance the overall taste.
Combine the lemon juice, garlic, and a pinch of salt in a bowl. Stir well to ensure the flavors blend evenly. This mixture will form the base of your sauce, adding a tangy and aromatic touch.
Deglazing the Pan for Maximum Flavor
After cooking your main ingredient, use the same pan to create the sauce. Deglazing the pan lifts the browned bits, adding richness and depth. Pour in a half cup of chicken broth and scrape the bottom of the pan with a wooden spoon.
Add the lemon juice mixture and a tablespoon of butter. Stir continuously as the sauce simmers. This process blends the flavors and creates a smooth, velvety texture.
Here’s a quick overview of the ingredient roles:
| Ingredient | Role |
|---|---|
| Lemon Juice | Adds tanginess |
| Garlic | Enhances aroma |
| Chicken Broth | Builds depth |
| Butter | Creates smoothness |
Simmer the sauce for 2-3 minutes, allowing the flavors to meld. Be mindful of the heat to avoid over-reduction. The result is a balanced sauce that complements your dish perfectly.
Tips for Making Perfect Lemon Pepper Chicken
Perfecting your dish requires attention to detail and a few expert tricks. Whether you’re a beginner or a seasoned cook, these tips will help you achieve a flavorful and juicy result every time.
Start with the right pepper seasoning. A balanced blend of spices ensures a zesty kick without overpowering the dish. Combine freshly ground black pepper, garlic powder, and a pinch of salt for a robust flavor profile.
To make lemon the star of your dish, use fresh juice and zest. The acidity brightens the flavors and complements the richness of the meat. Avoid bottled juice, as it lacks the freshness needed for a standout taste.
Here are additional tips to elevate your dish:
- Cook on medium-high heat to achieve a golden crust without drying out the meat.
- Let the dish rest for 5 minutes after cooking to lock in moisture.
- Garnish with fresh herbs like thyme or parsley for a pop of color and flavor.
Many food bloggers recommend these techniques for consistent results. One expert shared, “The key is to balance the seasoning and avoid overcooking. This ensures every bite is tender and flavorful.”
By following these tips, you’ll create a dish that’s both delicious and visually appealing. Whether you’re cooking for a weeknight dinner or meal prep, these strategies guarantee success.
Pairing Sides and Meal Prep Strategies
Balancing your meal with the right sides can elevate your dining experience. The right accompaniments not only complement the main dish but also add variety and nutrition to your plate. Here’s how to create a well-rounded meal that’s perfect for any occasion.
Ideas for Fresh Salads and Vegetable Sides
Fresh salads and vegetables are a great way to add color and crunch to your meal. A simple salad with mixed greens, cherry tomatoes, and a light vinaigrette pairs beautifully with the zesty flavors of the main dish. For a heartier option, try roasted vegetables like Brussels sprouts or broccoli.
These sides are easy to prepare and can be made in advance. Toss them with olive oil, garlic, and a pinch of salt before roasting for 20-25 minutes. This method brings out their natural sweetness and adds a smoky depth to your meal.
Starchy Options to Complement the Dish
Starchy sides like rice, mashed potatoes, or pasta are perfect for soaking up the flavorful sauce. A bed of fluffy white rice or creamy mashed potatoes creates a satisfying base for your dish. For a healthier twist, opt for quinoa or whole-grain pasta.
These options are also ideal for meal prep. Cook a large batch at the beginning of the week and store it in airtight containers. This ensures you have a ready-to-go side that pairs perfectly with your main dish.
| Side Dish | Preparation Time | Best Pairing |
|---|---|---|
| Mixed Green Salad | 10 minutes | Light and refreshing |
| Roasted Vegetables | 25 minutes | Smoky and hearty |
| White Rice | 15 minutes | Fluffy and versatile |
| Mashed Potatoes | 20 minutes | Creamy and comforting |
By pairing your dish with the right sides, you can create a balanced and satisfying meal. These strategies make meal prep easier and ensure every bite is packed with flavor and texture.
Storing and Reheating Your Meal Prep
Proper storage and reheating can make or break your meal prep success. Whether you’re planning for the week or saving leftovers, these tips will help you keep your dish fresh and flavorful.
Best Practices for Fridge and Freezer Storage
To maintain quality, store your meal in airtight containers. Use containers with a 1-cup capacity for individual portions. This ensures even cooling and prevents moisture loss.
For fridge storage, keep your dish for up to 4 days. Label containers with the date to track freshness. For longer storage, freeze portions in freezer-safe bags or containers for up to 3 months.
Simple Methods to Reheat Without Losing Flavor
Reheating your dish properly preserves its taste and texture. For the microwave, use 50% power and heat in 1-minute intervals. Stir the sauce bit by bit to distribute heat evenly.
For stovetop reheating, use a non-stick skillet on medium heat. Add a splash of broth or water to prevent drying. Stir occasionally until warmed through.
- Use airtight containers for fridge and freezer storage.
- Label containers with dates for easy tracking.
- Reheat in the microwave at 50% power for best results.
- Add broth or water when reheating on the stovetop.
By following these instructions, you’ll enjoy your meal as if it were freshly made. Proper storage and reheating ensure every bite is as delicious as the first.
Conclusion
Bringing together simplicity and flavor, this dish is a game-changer for busy schedules. From selecting fresh ingredients to mastering cooking techniques, this lemon pepper chicken recipe ensures a delicious meal in under 30 minutes. Its versatility makes it perfect for both quick dinners and meal prep.
With a zesty sauce and golden crust, this dish pairs well with a variety of sides. Whether you’re new to cooking or a seasoned pro, it’s easy to prepare and enjoy. Try experimenting with different sides and storage tips to make it your own.
We’d love to hear your feedback and personal experiences! Share your twists on this recipe and join a community of food enthusiasts. Remember, with the right tips and techniques, a flavorful and well-prepared meal is just minutes away.