Step-by-Step Ribeye Roast Recipes: Cook Like a Pro at Home

Have you ever wanted to recreate a restaurant-quality meal in your own kitchen? Imagine the aroma of a perfectly cooked dish filling your home, impressing your family and friends. With the right guidance, you can achieve that level of culinary mastery. This article is designed to help you do just that. ribeye roast recipe
Whether you’re a seasoned cook or just starting out, this guide simplifies the process. You’ll learn how to prepare a delicious meal with ease. The steps are straightforward, ensuring even beginners can follow along and achieve fantastic results.
From selecting the best ingredients to mastering the cooking techniques, every detail is covered. You’ll also discover tips to enhance the flavors and ensure your dish turns out perfectly every time. Let’s get started on this culinary journey together!
Table of Contents
Key Takeaways
- Learn how to cook a restaurant-style meal at home with ease.
- Follow detailed, step-by-step instructions for foolproof results.
- Discover tips to enhance flavors and achieve perfect doneness.
- Ideal for both beginners and experienced home cooks.
- Includes insights into techniques and ingredient selection.
Introduction to the Ultimate Ribeye Roast Experience
Transform your kitchen into a gourmet haven with this ultimate beef experience. This dish is more than just a meal—it’s a journey into creating something truly special. Every minute you spend preparing it is an investment in flavor and quality.
What makes this dish stand out? It’s the simplicity paired with the gourmet results. Whether it’s a weeknight dinner or a celebratory feast, this recipe delivers. The rich, robust flavors will leave your guests impressed and asking for seconds.
This guide is designed to help you achieve perfection. From selecting the right ingredients to mastering the cooking process, every step is covered. You’ll learn how to enhance the natural flavors of the beef and create a dish that’s both tender and juicy.
Here’s what you can expect:
- Detailed instructions that make the process easy, even for beginners.
- Tips to ensure your dish turns out perfectly every time.
- Expert advice on how to maximize flavor and tenderness.
Get ready to elevate your cooking skills and create a meal that’s worthy of any special occasion. Let’s dive into the ultimate ribeye roast experience!
What Makes a Ribeye Roast Special?
Ever wondered what sets a ribeye apart from other cuts? This premium piece of meat is known for its rich flavor and tender texture. It comes from the rib section of the cow, specifically between the sixth and twelfth rib. This area is prized for its marbling, which gives the meat its signature juiciness.
Understanding the Cut and Its Origins
The ribeye has a long history as a centerpiece for special occasions. Traditionally, it was reserved for Sunday dinners or holiday feasts. Its popularity stems from its balance of flavor and tenderness. The cut’s marbling—the thin streaks of fat within the muscle—melts during cooking, infusing the meat with moisture and richness.
This cut is often boneless, making it easier to prepare and carve. However, bone-in versions, known as rib roast, are also popular. The bone adds extra flavor during cooking, making it a favorite among chefs and home cooks alike.
Comparing Ribeye Roast with Prime Rib
While both come from the rib section, there are key differences. Prime rib is typically bone-in and includes more of the rib bone. Ribeye, on the other hand, is usually boneless and focuses on the eye of the rib. This makes it more affordable and easier to handle.
Another distinction is the marbling. Ribeye tends to have more fat distributed throughout the meat, enhancing its flavor and tenderness. Prime rib, while still flavorful, may have less consistent marbling.
Herbs like rosemary and thyme are often used to complement the natural taste of this premium cut. Their aromatic qualities enhance the meat’s richness without overpowering it. Whether you choose ribeye or prime rib, both offer a gourmet experience that’s hard to beat.
ribeye roast recipe
Cooking a boneless masterpiece at home is easier than you think. This detailed guide walks you through every step, ensuring a flavorful and tender result. Whether you’re a beginner or a seasoned cook, this method is designed for success.
Start by preheating your oven to 450°F. This high temperature helps create a delicious crust. While the oven heats, prepare your boneless cut by patting it dry with paper towels. This ensures even browning.
Next, season generously with salt and pepper. For added flavor, mix softened butter with minced garlic, rosemary, and thyme. Spread this mixture evenly over the meat. The butter not only enhances taste but also helps the seasoning stick.
Place the meat on a rack in a roasting pan. This allows heat to circulate evenly. Roast at 450°F for 20 minutes, then reduce the temperature to 250°F. Continue cooking until the internal temperature reaches 125°F for medium-rare. Use a meat thermometer for precision.
Once cooked, let it rest for 20-30 minutes. This allows the juices to redistribute, ensuring a moist and tender result. Slice against the grain for the best texture.
| Step | Time | Temperature |
|---|---|---|
| Preheat Oven | 10 minutes | 450°F |
| Initial Roasting | 20 minutes | 450°F |
| Continued Roasting | 1.5 hours | 250°F |
| Resting | 20-30 minutes | Room Temp |
This roast recipe is perfect for special occasions or a hearty family dinner. With these steps, you’ll create a dish that’s both impressive and delicious. Enjoy!
Essential Ingredients for a Perfect Roast
The secret to a mouthwatering dish lies in the ingredients you choose. Every component plays a vital role in creating a flavorful and tender result. From the quality of the meat to the seasonings and herbs, each element contributes to the final masterpiece.
Key Seasonings and Herbs
Seasonings are the backbone of any great dish. Kosher salt and freshly ground pepper are essential for enhancing the natural flavors of the meat. Italian herbs like rosemary, thyme, and oregano add an aromatic touch that complements the richness of the dish.
Proper measurement is crucial. Too much seasoning can overpower the meat, while too little may leave it bland. A balanced blend ensures a robust and well-rounded flavor profile.
The Role of Butter and Garlic
Butter and garlic are a match made in culinary heaven. Butter not only adds richness but also helps the seasoning stick to the meat. When combined with minced garlic, it creates a flavorful crust that locks in moisture.
For best results, use softened butter and fresh garlic. Spread the mixture evenly over the meat before cooking. This simple step can elevate your dish from good to unforgettable.
Preparing Your Roast: Bringing It to Room Temperature
The key to a perfectly cooked dish begins long before it hits the oven. One of the most important steps is allowing your meat to reach room temperature. This simple yet crucial practice ensures even cooking and optimal results.
When meat is cold, the outside cooks faster than the inside. This can lead to uneven doneness. Bringing it to room temperature for about 30 minutes helps it cook more evenly. This step also reduces the overall cooking time later.
Proper timing is essential. Letting the meat sit for too long can be unsafe, while too little time won’t yield the desired results. Aim for 30 minutes to an hour, depending on the size of your cut. This preparation step ensures a tender and juicy outcome.
This process also ties into other elements like seasoning and oven use. As the meat warms, it becomes more receptive to flavors. Pair it with sides like a baked potato for a complete meal. When you’re ready to cook, preheat your oven to the right temperature for consistent results.
Taking the time to prepare your meat correctly sets the stage for success. It’s a small step that makes a big difference in the final dish. Your efforts will be rewarded with a meal that’s both flavorful and perfectly cooked.
Step-by-Step Preparation and Seasoning Process
Mastering the art of seasoning is the first step to creating a flavorful dish. Proper preparation ensures every bite is packed with taste and tenderness. Let’s break down the process into simple, actionable steps.

Melted Butter and Dry Rub Application
Start by melting butter in a small bowl. Combine it with minced garlic and your choice of herbs. This mixture will create a rich, flavorful crust on the meat. Use a tablespoon to measure the ingredients accurately.
Next, apply the melted butter mixture evenly over the meat. This helps the seasoning stick and enhances the flavor. Use a pan to catch any drippings, making cleanup easier.
Pre-Salting and Marinating Techniques
Pre-salting is a crucial step. Generously sprinkle salt over the meat at least 30 minutes before cooking. This allows the salt to penetrate, enhancing the natural flavors.
For marinating, combine your favorite herbs and spices in a bowl. Rub this mixture over the meat, ensuring even coverage. Let it sit for at least an hour to allow the flavors to meld.
Proper preparation and seasoning set the stage for a delicious meal. Follow these steps to ensure your dish turns out perfectly every time.
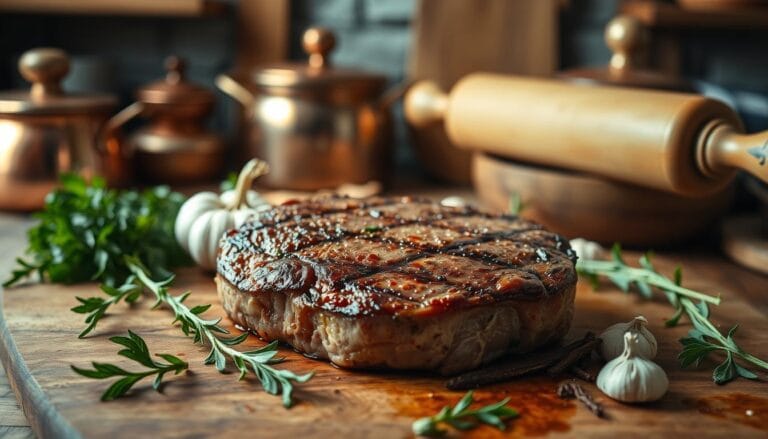
Perfecting Initial High-Temperature Searing
Starting your cooking process with a high-temperature sear is the secret to a mouthwatering crust. This step locks in juices and creates a beautiful, flavorful exterior that’s hard to resist. It’s a technique that elevates your dish from ordinary to extraordinary.
Achieving a Flavorful, Browned Crust
To achieve the perfect crust, preheat your oven to 450°F. This high temperature ensures the meat browns quickly, sealing in moisture. Place your seasoned cut on a rack in a roasting pan to allow heat to circulate evenly.
Generously coat the meat with a mixture of softened butter, minced garlic, and fresh thyme. The butter helps the seasoning adhere while adding richness. Roast at 450°F for 20 minutes to develop that golden-brown crust.
This initial sear is not just about looks—it’s about flavor. The high heat caramelizes the surface, creating a depth of taste that’s unmatched. It’s the foundation for a dish that’s as stunning as it is delicious.
Mastering Low and Slow Roasting Techniques
Slow-roasting is a game-changer for achieving tender, juicy results every time. This method involves cooking at a lower temperature over a longer period, allowing the meat to develop deep, rich flavors. It’s a technique that professionals rely on for its consistency and ability to produce succulent dishes.
One of the key benefits of slow-roasting is its ability to break down connective tissues naturally. This process ensures that your meal is not only tender but also packed with flavor. By maintaining a steady, low temperature, you avoid overcooking and preserve the meat’s moisture.
Precision is essential when using this method. Cooking times are measured in minutes per pound, ensuring even doneness throughout. For example, an 8-pound cut typically requires about 2 to 2.5 hours at 275°F. This careful timing prevents dryness and guarantees a perfect result.
Slow-roasting also enhances the natural flavors of the beef. The extended cooking time allows the seasonings to penetrate deeply, creating a harmonious blend of tastes. Whether you’re preparing a special meal or a weeknight dinner, this technique delivers exceptional results.
Professionals recommend this method for its reliability and ability to produce a roast that’s both tender and flavorful. By mastering low and slow cooking, you can elevate your culinary skills and create dishes that impress every time.
The Importance of Temperature and Using a Thermometer
Achieving the perfect doneness starts with precise temperature control. Monitoring the internal temperature ensures your dish turns out exactly as you want it. Overcooking can ruin the texture, while undercooking may compromise safety. A reliable thermometer is your best tool for consistent results.
Using an oven-proof thermometer allows you to track the temperature without opening the oven. This prevents heat loss and ensures even cooking. Checking the internal temperature at the thickest part of the meat gives the most accurate reading.
Temperature Guidelines for Different Levels of Doneness
Here’s a quick guide to help you achieve your desired level of doneness:
| Doneness | Internal Temperature |
|---|---|
| Rare | 120°F – 125°F |
| Medium-Rare | 125°F – 130°F |
| Medium | 130°F – 135°F |
| Well-Done | 140°F+ |
Remember, the temperature will rise 5-10°F during resting. Remove the dish from the oven a few degrees below your target to account for this. This ensures the final result is perfect.
Understanding how temperature affects texture and flavor is key. Lower temperatures yield tender, juicy results, while higher ones create a firmer texture. Use these guidelines to cook with confidence and precision.
Expert Tips and Tricks for a Juicy Roast
Want to master the art of cooking a juicy, flavorful dish? Here’s how. With the right techniques, you can achieve a tender and evenly cooked result every time. These expert tips will guide you through the process, ensuring your meal is a success.
Pressing Matters: When, How, and Why to Check the Temperature
Checking the internal temperature is crucial for perfect doneness. Use a reliable thermometer to monitor the heat without opening the oven. This prevents heat loss and ensures even cooking.
Insert the thermometer into the thickest part of the meat for an accurate reading. Follow temperature guidelines to achieve your desired level of doneness. Remember, the temperature will rise 5-10°F during resting, so remove the dish a few degrees below your target.
Using a Roasting Pan and Rack for Even Cooking
A roasting pan with a rack is essential for even air circulation and browning. The rack elevates the meat, allowing heat to reach all sides. This ensures a consistent texture and prevents sogginess.
Place the meat on the rack before placing it in the oven. This setup also catches drippings, making cleanup easier. For best results, avoid over-handling the meat during cooking. Let the oven do the work.
By following these expert tips, you’ll create a dish that’s both juicy and flavorful. Whether you’re a beginner or a seasoned cook, these techniques will elevate your cooking skills.
Creating a Delicious Crust: Herbs, Salt, and Seasoning Strategies
Crafting a perfect crust is the key to unlocking deep, rich flavors in your dish. A well-seasoned exterior not only seals in moisture but also adds a satisfying crunch that elevates every bite. Let’s explore the techniques and ingredients that make this possible.
Start with salt, a fundamental ingredient that enhances the natural taste of the meat. Generously sprinkle it over the surface to draw out moisture and create a flavorful base. Pair it with freshly ground pepper for a balanced seasoning blend.
Butter plays a crucial role in forming a golden, crispy crust. Mix softened butter with minced garlic and fresh herbs like rosemary or thyme. Spread this mixture evenly over the meat to ensure the seasoning sticks and the crust develops beautifully.
Herbs add an aromatic touch that complements the richness of the dish. Use fresh or dried varieties depending on availability. For a more intense flavor, let the seasoned meat sit for a few hours before cooking. This allows the herbs to infuse the meat deeply.
Place the meat on a rack in a roasting pan to allow heat to circulate evenly. This setup ensures the crust forms uniformly on all sides. Avoid overcrowding the pan, as this can lead to steaming instead of browning.
Adjust the seasoning to suit your taste preferences. If you prefer a spicier crust, add a pinch of paprika or chili powder. For a more savory profile, incorporate garlic powder or onion powder. Experiment with different combinations to find your perfect blend.
By mastering these strategies, you’ll create a dish with a crust that’s both visually appealing and packed with flavor. These simple steps will transform your cooking and impress everyone at the table.
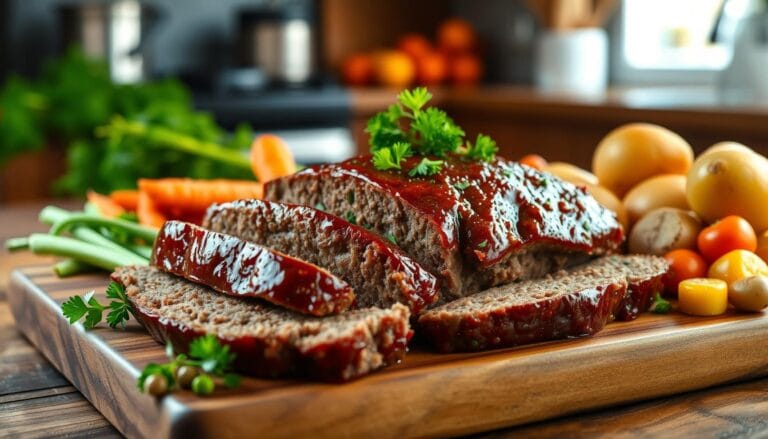
Carving and Resting: Ensuring Tender, Juicy Meat
The final steps of cooking are just as important as the preparation itself. Properly resting and carving your dish ensures it remains tender and juicy. These techniques make all the difference in delivering a perfect meal.
Letting the Meat Rest for Maximum Juiciness
Resting the meat after cooking is crucial. This allows the juices to redistribute throughout the cut, ensuring every bite is moist. For best results, let it rest for about 20-30 minutes before carving.
During this time, the internal temperature will rise slightly, achieving the ideal doneness. Cover the meat loosely with foil to retain warmth without trapping steam. This step is essential for maintaining texture and flavor.

Proper Carving Techniques for Maximum Tenderness
When it’s time to carve, use a sharp knife to slice against the grain. This technique breaks down muscle fibers, making the meat more tender. Aim for even, medium-thick slices for the best texture.
For a steak-like presentation, cut the meat into portions that are easy to serve. Proper slicing ensures each piece is flavorful and visually appealing. Place the slices on a warm platter to keep them at the perfect serving temperature.
By following these steps, you’ll create a dish that’s both tender and juicy. Careful handling after cooking ensures the final result is as impressive as the preparation process.
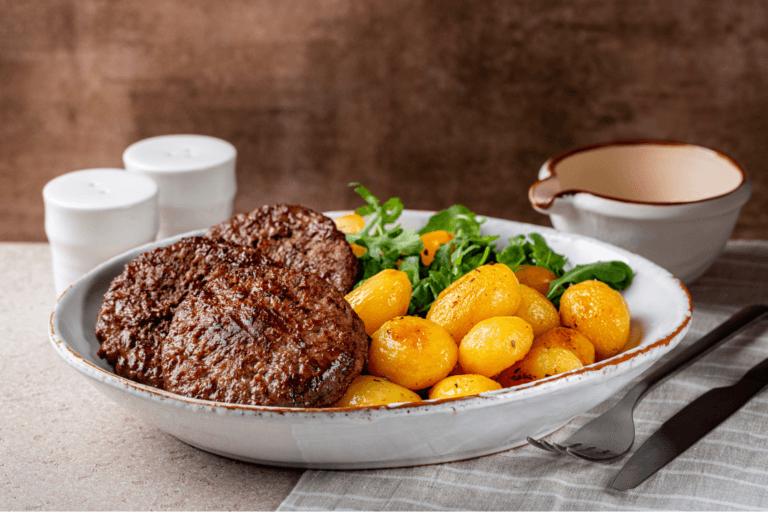
Side Dishes and Complementary Flavors for Your Roast
Pairing your meal with the right sides can transform a simple dinner into a feast. The right side dishes not only enhance the flavors of your main dish but also add variety and balance to your plate. Whether you’re hosting a special occasion or enjoying a family meal, these ideas will elevate your dining experience.
Hearty Options Like Mashed Potatoes and Grilled Vegetables
Mashed potatoes are a classic choice that pairs beautifully with savory meats. Their creamy texture and rich flavor make them a crowd-pleaser. For a twist, try adding garlic or herbs to your mashed potatoes. This simple addition can take this staple side to the next level.
Grilled vegetables are another excellent option. They add color, texture, and a healthy balance to your meal. Bell peppers, zucchini, and asparagus are great choices. Toss them with olive oil, salt, and pepper before grilling for a quick and flavorful side.
Here’s a quick guide to some of the best side dishes to complement your meal:
| Side Dish | Preparation Time | Flavor Profile |
|---|---|---|
| Mashed Potatoes | 20 minutes | Creamy, buttery |
| Grilled Vegetables | 15 minutes | Smoky, fresh |
| Garlic Bread | 10 minutes | Crispy, savory |
| Roasted Carrots | 25 minutes | Sweet, tender |
These sides are easy to prepare and can be made while your main dish is cooking. For a complete meal, consider adding a fresh salad or warm dinner rolls. These additions round out the plate and ensure everyone leaves satisfied.
Choosing the right ingredients for your sides is just as important as selecting the main dish. Fresh, high-quality ingredients make a noticeable difference in flavor. Whether you’re using potatoes, vegetables, or bread, opt for the best you can find.
With these ideas, you can create a well-balanced and delicious meal that’s perfect for any occasion. Experiment with different combinations to find your favorite pairings. Your next dinner will be a memorable one!
Storing, Freezing, and Reheating Leftovers
Properly storing and reheating leftovers can make your meal last longer without losing flavor. With the right techniques, you can enjoy your dish just as much the next day. Here’s how to preserve its quality and taste.
Proper Storage Techniques to Preserve Flavor
To keep your leftovers fresh, wrap them tightly in foil or plastic wrap. This prevents air exposure, which can dry out the meat. Place the wrapped leftovers in an airtight container or a resealable bag for extra protection.
For refrigeration, store the meat in the coldest part of your fridge. It will stay fresh for up to 5-7 days. If you plan to freeze it, use freezer-safe packaging to avoid freezer burn. Frozen leftovers can last up to 3-4 months.
Reheating Methods That Keep the Roast Moist
When reheating, use low and slow methods to retain moisture. Preheat your oven to 250°F and wrap the meat in foil to lock in juices. This method takes about 10 minutes per slice, ensuring even warmth without drying it out.
For smaller portions, steaming on the stovetop is a quick option. Add a few tablespoons of broth or au jus to the pan for extra moisture. Heat for 3-6 minutes, checking frequently to avoid overcooking.
Here’s a quick guide to reheating times:
| Method | Time |
|---|---|
| Oven | 10 minutes per slice |
| Stovetop | 3-6 minutes |
| Microwave | 1-2 minutes |
By following these steps, you can enjoy your meal for days without sacrificing flavor or texture. Proper storage and reheating make all the difference.
Common Pitfalls, Variations and Dietary Substitutions for Your Recipe
Avoiding pitfalls and adapting recipes can elevate your cooking game. Even the most experienced home cooks can make mistakes, but with a few tips, you can ensure your dish turns out perfectly every time. Let’s explore common errors and how to fix them, along with variations for different dietary needs.
Common Mistakes and How to Avoid Them
One frequent mistake is not letting the meat rest after cooking. Skipping this step can result in dry, less flavorful results. Always allow it to rest for at least 20-30 minutes to let the juices redistribute.
Another error is overcooking. Use a thermometer to monitor the internal temperature. For medium-rare, aim for 125°F before resting. This prevents the meat from becoming tough and dry.
Seasoning too late is another pitfall. Pre-salting at least 30 minutes before cooking enhances flavor. Don’t forget to pat the meat dry before seasoning to ensure a good crust.

Dairy-Free and Paleo Options
For those avoiding dairy, replace butter with olive oil or avocado oil. These alternatives still add richness and help the seasoning stick. Garlic and herbs like rosemary and thyme remain excellent flavor enhancers.
Paleo-friendly options include using coconut aminos instead of soy sauce for a marinade. You can also substitute traditional sides like mashed potatoes with cauliflower mash or roasted sweet potatoes.
Thoughtful Adjustments for Flavor
Adapting a classic recipe doesn’t mean sacrificing taste. Use high-quality ingredients and follow each step carefully. For example, a rib roast can still shine with dairy-free or paleo adjustments. The key is to maintain balance and enhance the natural flavors of the meat.
Experiment with different herbs and spices to find what works best for your preferences. Fresh or dried varieties can add depth without overwhelming the dish.
By avoiding common mistakes and making thoughtful adjustments, you can create a meal that’s both delicious and tailored to your needs. Whether you’re cooking for a special occasion or a weeknight dinner, these tips ensure success.
Enhancing the Flavor with Sauces and Garnishes & Conclusion
Elevate your holiday feast with a simple yet elegant sauce that complements your main dish perfectly. A well-crafted sauce can add depth and richness, turning a great meal into an unforgettable experience. Let’s explore a quick recipe to enhance your dish.
Simple Sauce Recipes to Elevate Your Meal
For a classic sauce, combine beef drippings, broth, and a splash of Worcestershire sauce. Simmer until the flavors meld, creating a light and flavorful accompaniment. This easy recipe pairs beautifully with the natural richness of your dish.
When serving, slice your meat against the grain for maximum tenderness. Pair it with hearty sides like mashed potatoes or grilled vegetables for a balanced meal. These additions enhance the overall dining experience, making it perfect for any holiday gathering.
Experiment with garnishes like fresh herbs or a drizzle of melted butter for added flair. These small touches can elevate the presentation and flavor of your dish. Share your creations and inspire others to try these tips!
We’d love to hear about your cooking adventures. Leave a comment or share your results on social media. Happy cooking!